Getting Started
A small React Counter example to get you up and running with Movex.
You can see the finished code here https://github.com/movesthatmatter/movex-counter-example (opens in a new tab).
Pre-requisites: Create React App and Run it
See more here (opens in a new tab).
npx create-react-app my-movex-app --template typescript
cd my-movex-app
yarn start
1. Install it
yarn add movex movex-react; yarn add --dev movex-service2. Create the Movex Config File
export default {
  resources: {},
};
3. Start Movex in Dev Mode
npx movex dev4. Wrap the App in the MovexProvider
import React from 'react';
import logo from './logo.svg';
import './App.css';
import { MovexProvider } from 'movex-react';
import movexConfig from './movex.config';

export default function App() {
  return (
    <MovexProvider
      movexDefinition={movexConfig}
      socketUrl="localhost:3333"
      onConnected={() => {
        console.log('Movex Connected');
      }}
    >
      <div className="App">
        <header className="App-header">
          <img src={logo} className="App-logo" alt="logo" />
          <p>
            Edit <code>src/App.tsx</code> and save to reload.
          </p>
          <a
            className="App-link"
            href="https://reactjs.org"
            target="_blank"
            rel="noopener noreferrer"
          >
            Learn React
          </a>
        </header>
      </div>
    </MovexProvider>
  );
}
5. Add a Movex Resource
In this short tutorial we're going to build a Counter App that will sync in real-time with another client out of the box.
Add the movex file (action, state, reducer) to define the resource.
import { Action } from 'movex';

// State
export type CounterState = {
  count: number;
};

export const initialCounterState: CounterState = {
  count: 0,
};

// Actions
export type CounterActions =
  | Action<'increment'>
  | Action<'decrement'>
  | Action<'incrementBy', number>;

// Reducer
export default reducer = (
  state = initialCounterState,
  action: CounterActions
) => {
  if (action.type === 'increment') {
    return {
      ...state,
      count: state.count + 1,
    };
  }

  if (action.type === 'decrement') {
    return {
      ...state,
      count: state.count - 1,
    };
  }

  if (action.type === 'incrementBy') {
    return {
      ...state,
      count: state.count + action.payload,
    };
  }

  return state;
};
And Reference it in the movex.config file by a name (counter)
import counterReducer from './counter.movex';

export default {
  resources: {
    counter: counterReducer,
  },
};
6. Let's add the Counter Component
For this tutorial, we'll keep the UI very basic since it's not the main point.
import { useMovexBoundResourceFromRid } from 'movex-react';
import React from 'react';
import movexConfig from './movex.config';
import { ResourceIdentifier } from 'movex';

type Props = {
  rid: ResourceIdentifier<'counter'>;
};

export const Counter: React.FC<Props> = (props) => {
  const counter = useMovexBoundResourceFromRid(movexConfig, props.rid);

  if (!counter) {
    return null;
  }

  return (
    <div>
      <button>Increment</button>
      <h1>{counter.state.count}</h1>
      <button>Decrement</button>
    </div>
  );
};
What's happening here?
On line 11 we're binding to the counter resource by rid. This means that now we get access to the Resource state by accessing counter.state and to the Action Dispatcher by accessing counter.dispatch()
In the following lines we're rendering a very simple UI, which displays the Counter State at line 20 and adding two Buttons which will be responsible for triggering the "Increment" and "Decrement" actions.
7. And hook it up with our App
import React, { useMemo } from 'react';
import './App.css';
import { MovexProvider } from 'movex-react';
import movexConfig from './movex.config';
import { toRidAsStr, ResourceIdentifier } from 'movex';
import { initialCounterState } from './counter.movex';
import { Counter } from './Counter';

function App() {
  const counterRid = useMemo(() => {
    const params = new URL(window.location as any).searchParams;
    return params.get('rid') as ResourceIdentifier<'counter'>;
  }, [window.location.href]);

  return (
    <MovexProvider
      movexDefinition={movexConfig}
      socketUrl="localhost:3333"
      onConnected={(instance) => {
        console.log('Movex Connected');

        if (!counterRid) {
          instance
            .register('counter')
            .create(initialCounterState)
            .map((counterResource) => {
              window.location.href += `?rid=${toRidAsStr(counterResource.rid)}`;
            });
        }
      }}
    >
      <div
        className="App"
        style={{
          height: '100vh',
          display: 'flex',
          alignItems: 'center',
          justifyContent: 'center',
        }}
      >
        {counterRid && <Counter rid={toRidAsStr(counterRid)} />}
      </div>
    </MovexProvider>
  );
}

export default App;
What's going on here?
To keep things simple, we're creating a new Counter Resource as soon as posisble – once a movex instance is connected (Lines 22-29).
Once the Resource gets created (line 27), we add its rid (ResourceIdentifier) to the url param so it can be used by an outsider as well. More on this later.
Then, render the Counter Component if there is a rid set in the url params.
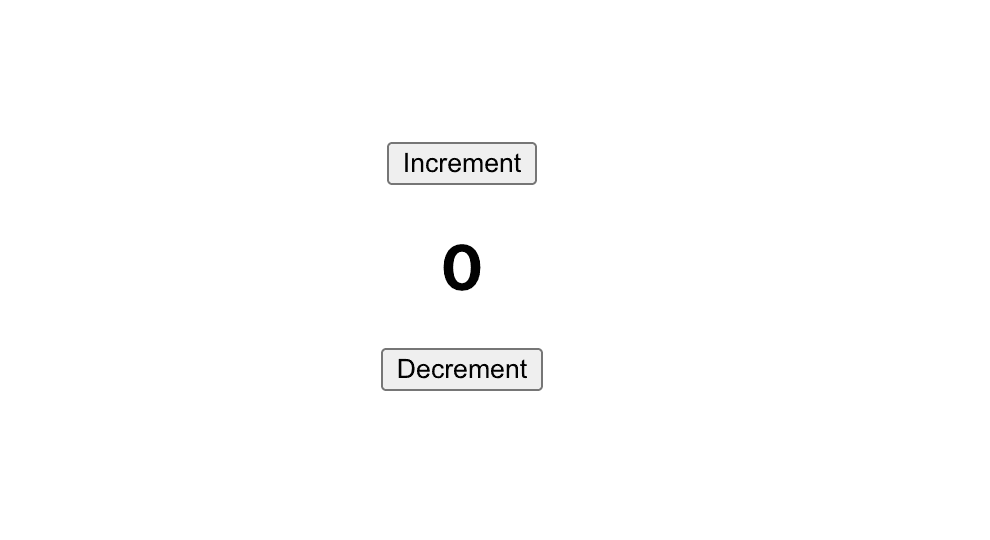
This is how it looks like so far:
8. Let's add the Actions
At this point we can see the state of the Counter Resource but cannot do much with it.
Let's make that possible by dispatching some actions in the on click handlers of the "Increment" and "Decrement" buttons we created above.
It should look like this.
import { useMovexBoundResourceFromRid } from 'movex-react';
import React from 'react';
import movexConfig from './movex.config';
import { ResourceIdentifier } from 'movex';
type Props = {
rid: ResourceIdentifier<'counter'>;
};
export const Counter: React.FC<Props> = (props) => {
const counter = useMovexBoundResourceFromRid(movexConfig, props.rid);
if (!counter) {
return null;
}
return (
<div>
<button
onClick={() => {
counter.dispatch({
type: 'increment',
});
}}
>
Increment
</button>
<h1>{counter.state.count}</h1>
<button
onClick={() => {
counter.dispatch({
type: 'decrement',
});
}}
>
Decrement
</button>
</div>
);
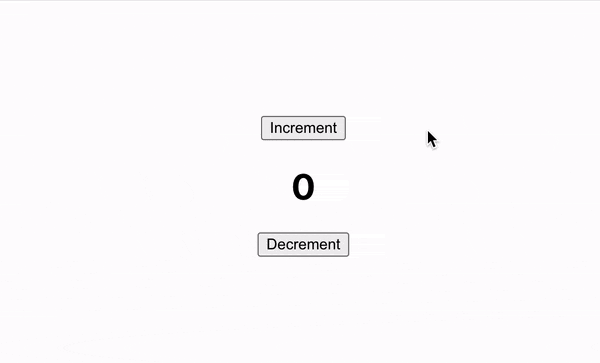
};And you should be able to see this:
9. Now bring in multi-players
Open the URL in another browser tab or 2, or even 9 and start clicking the buttons. The changes will be synced in realtime, without any server-side coding.
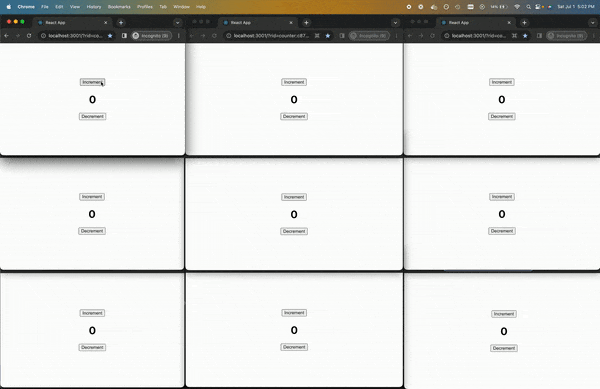
The world is your oyster now – go make multiplayer gameees! :D
10. Homework
If you want an extra step, implement the "incrementBy" Action and functionality.